This integration allows to link Ribbo AI Chat to your Facebook Page, so Ribbo can manage all messages with your customers directly on Facebook.
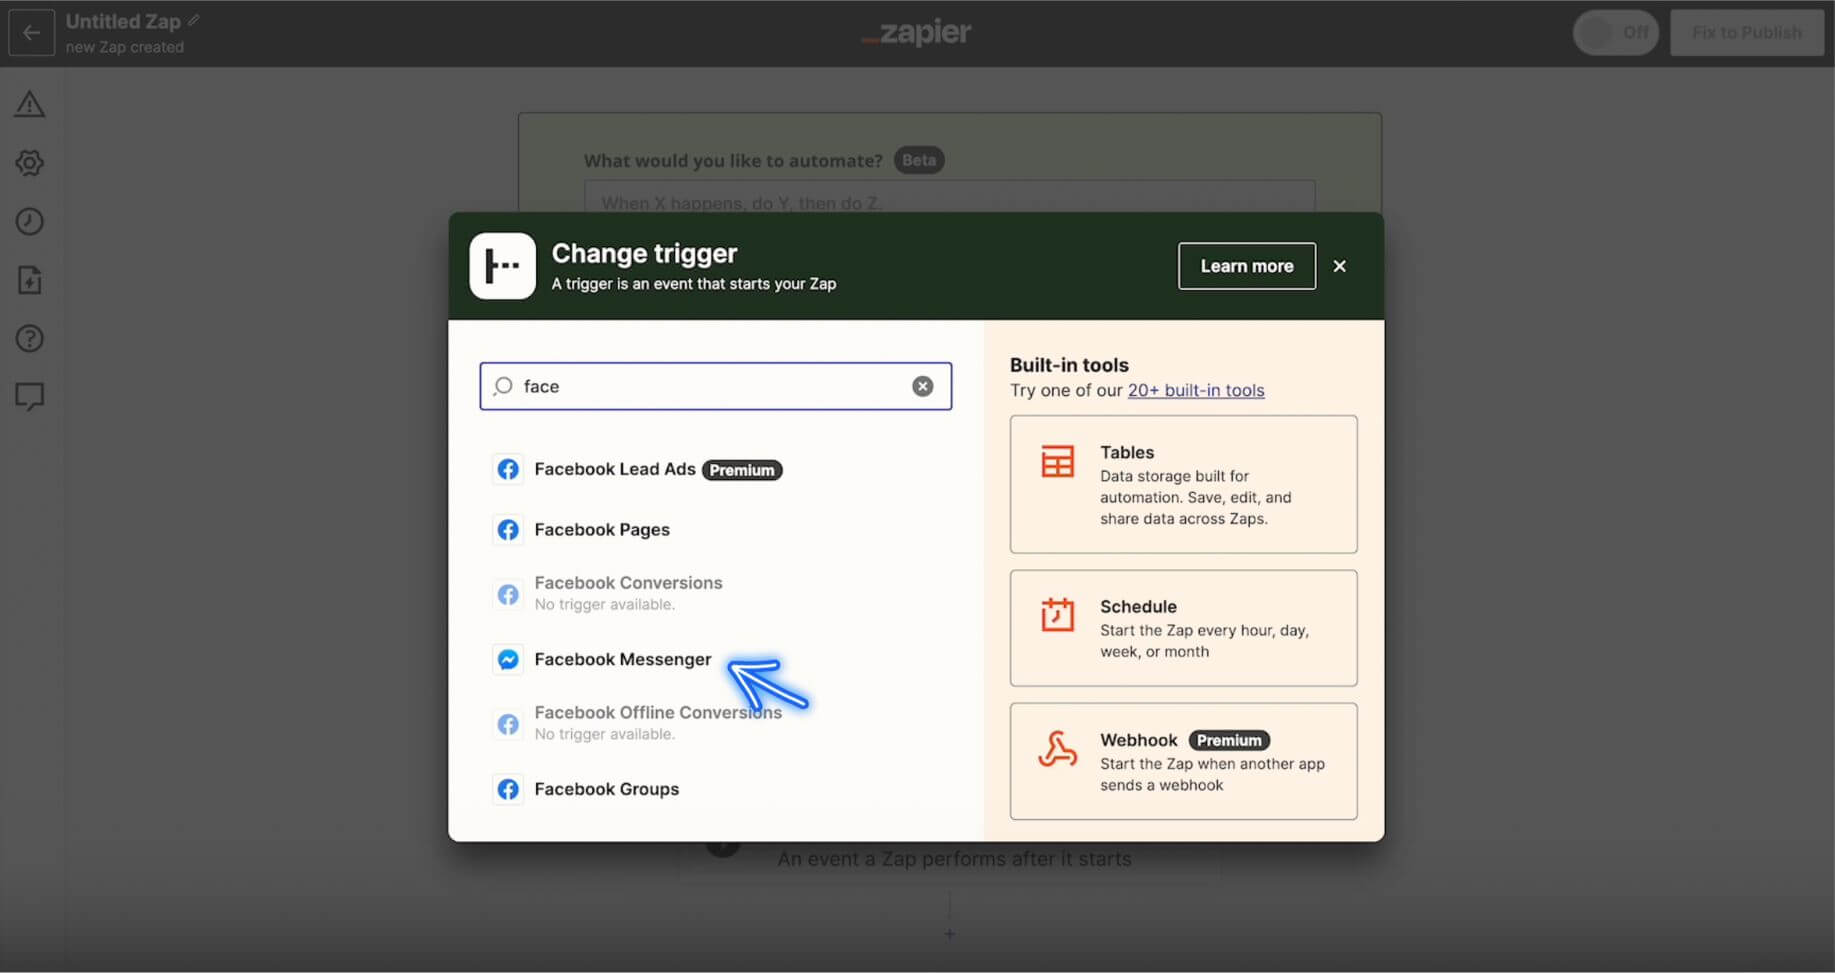
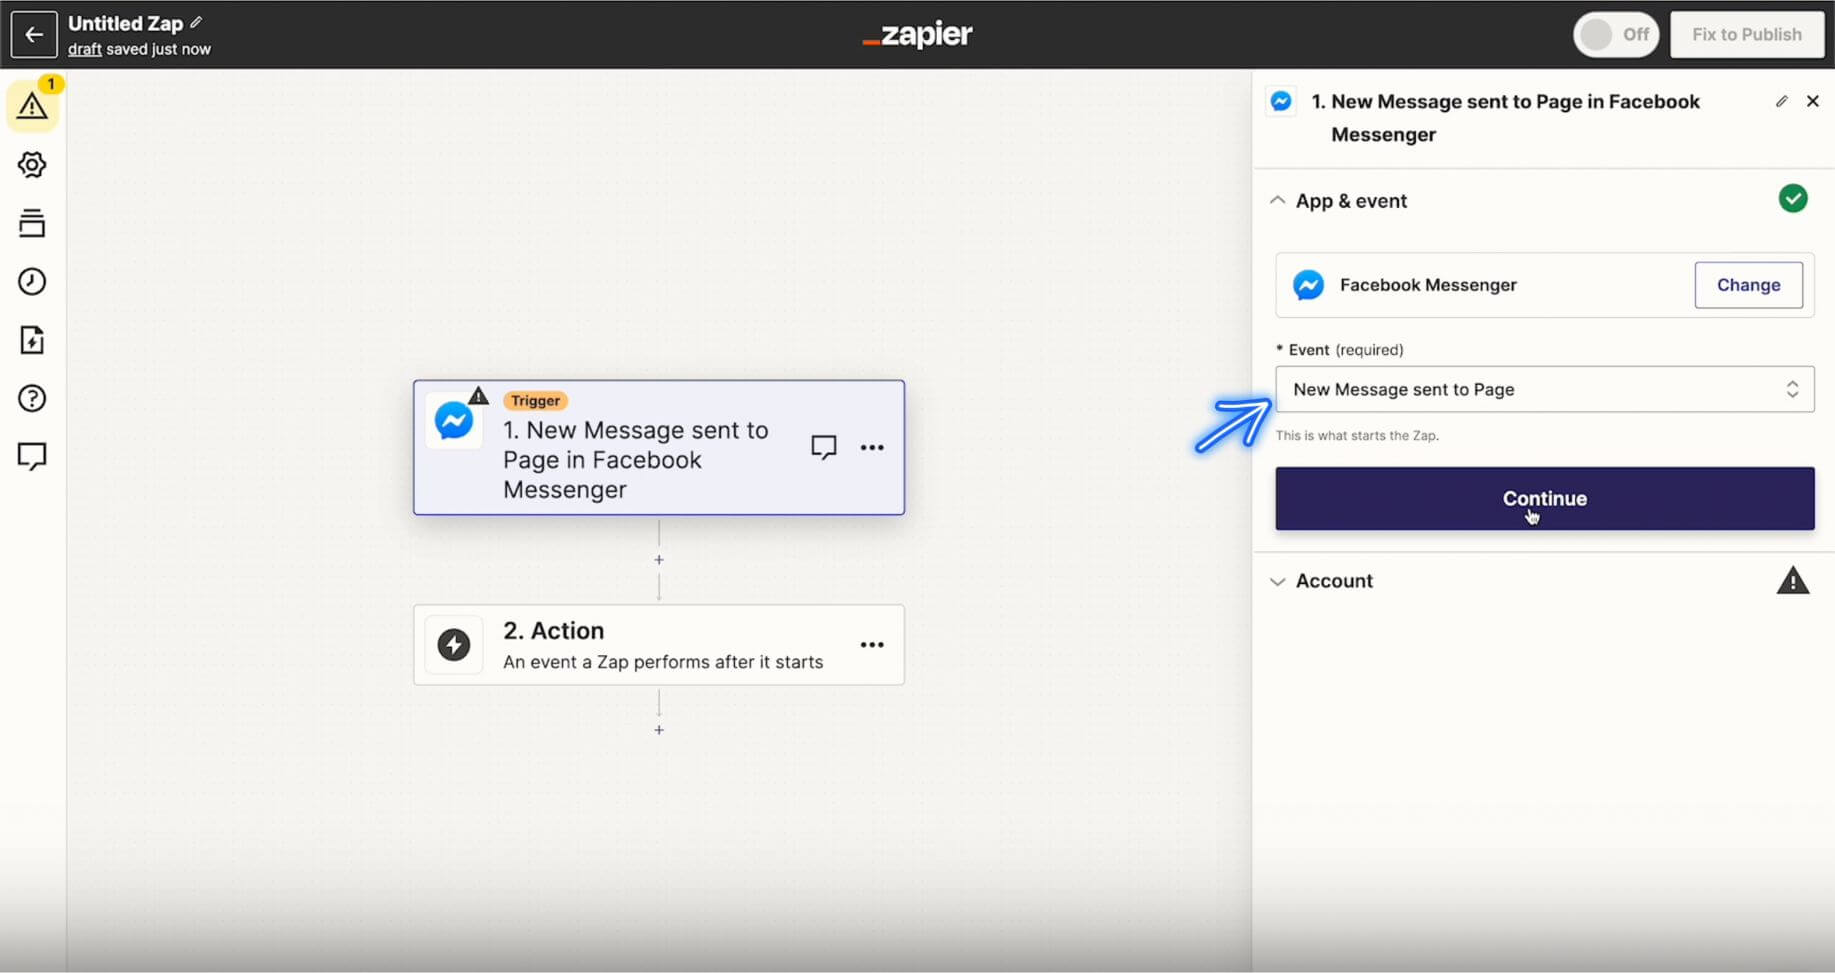
1. Log into Zapier, head to the Editor and choose Facebook Messenger as the first trigger.
2. On the right side bar, in the Event field, choose New Message sent to Page, then click Continue and Sign In.
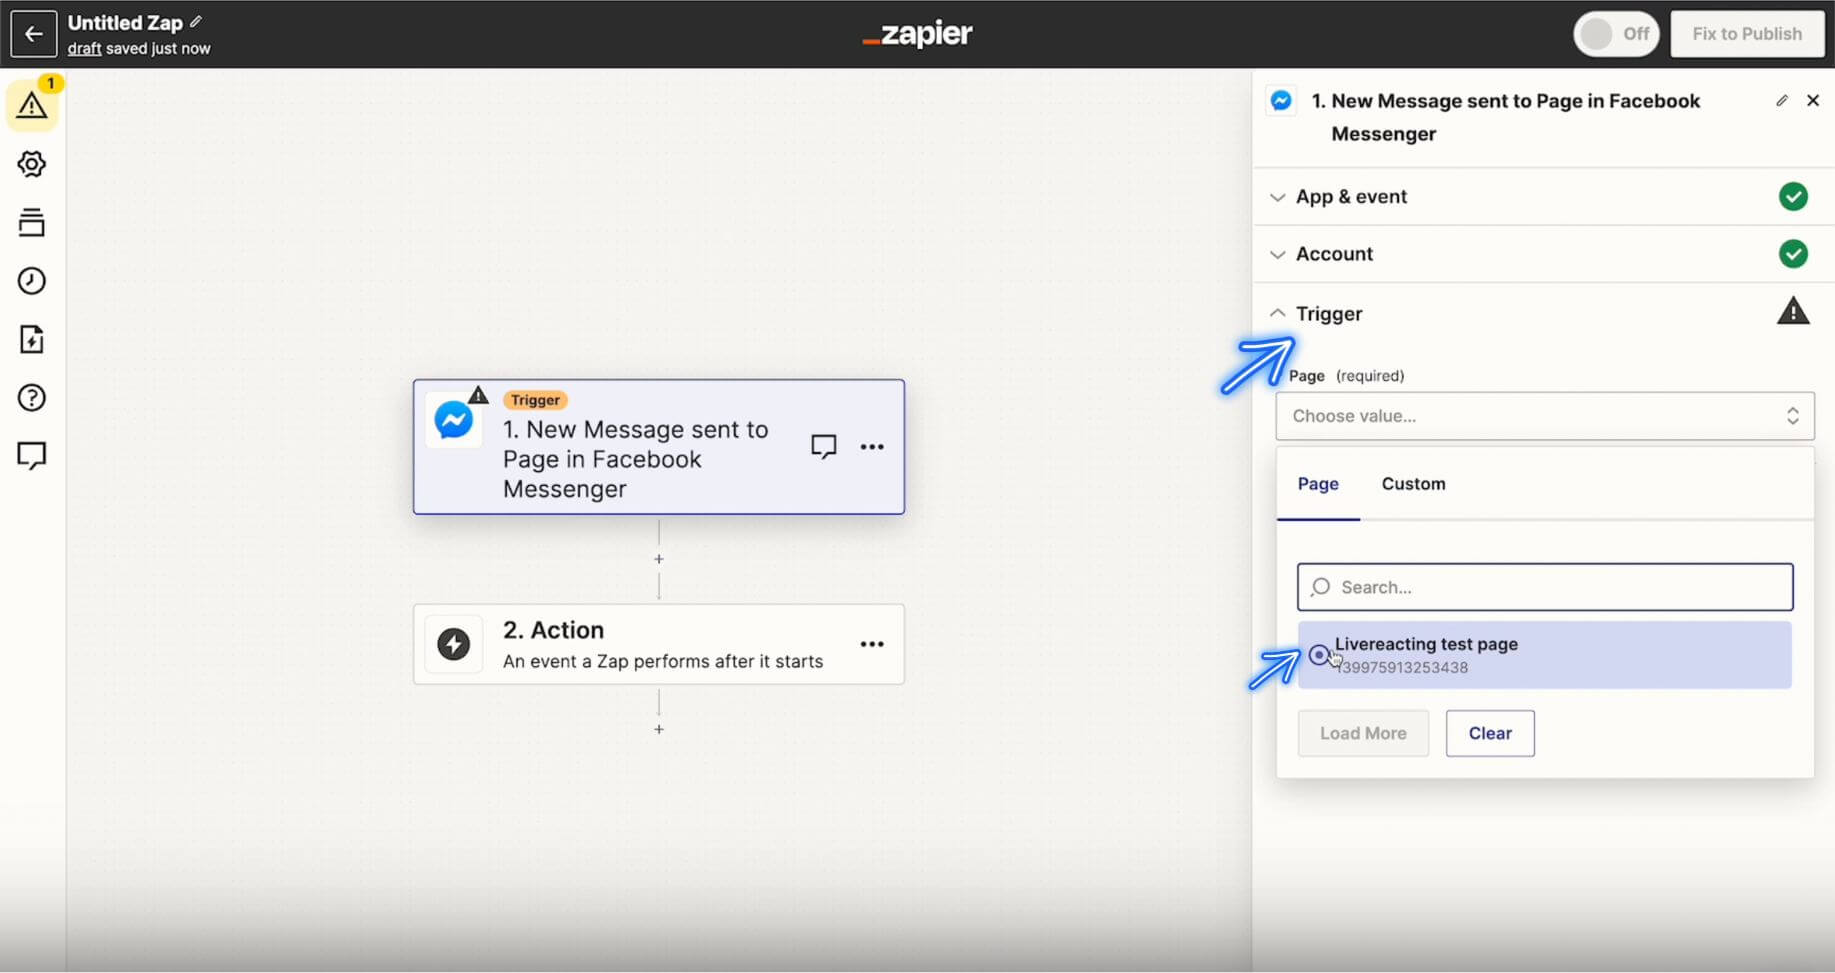
3. Choose Facebook Page which you wish to connect and click Sign In on the right side bar.
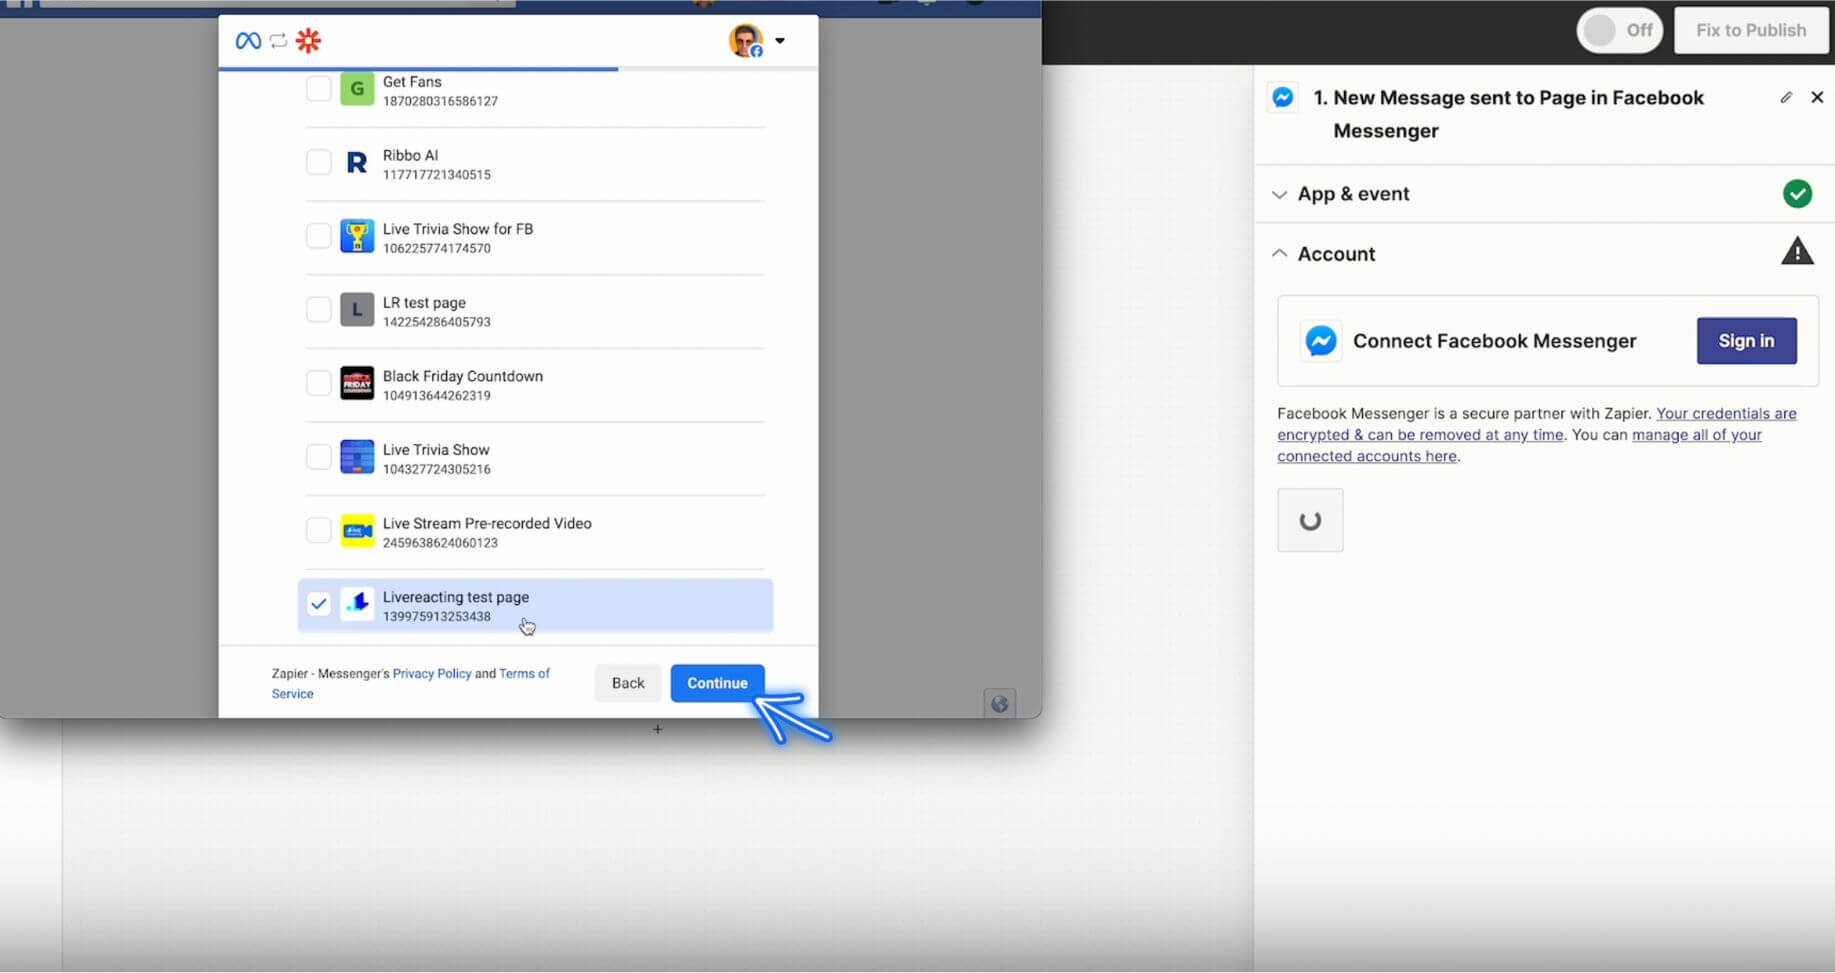
4. In the Trigger field, choose your Facebook page and click Continue.
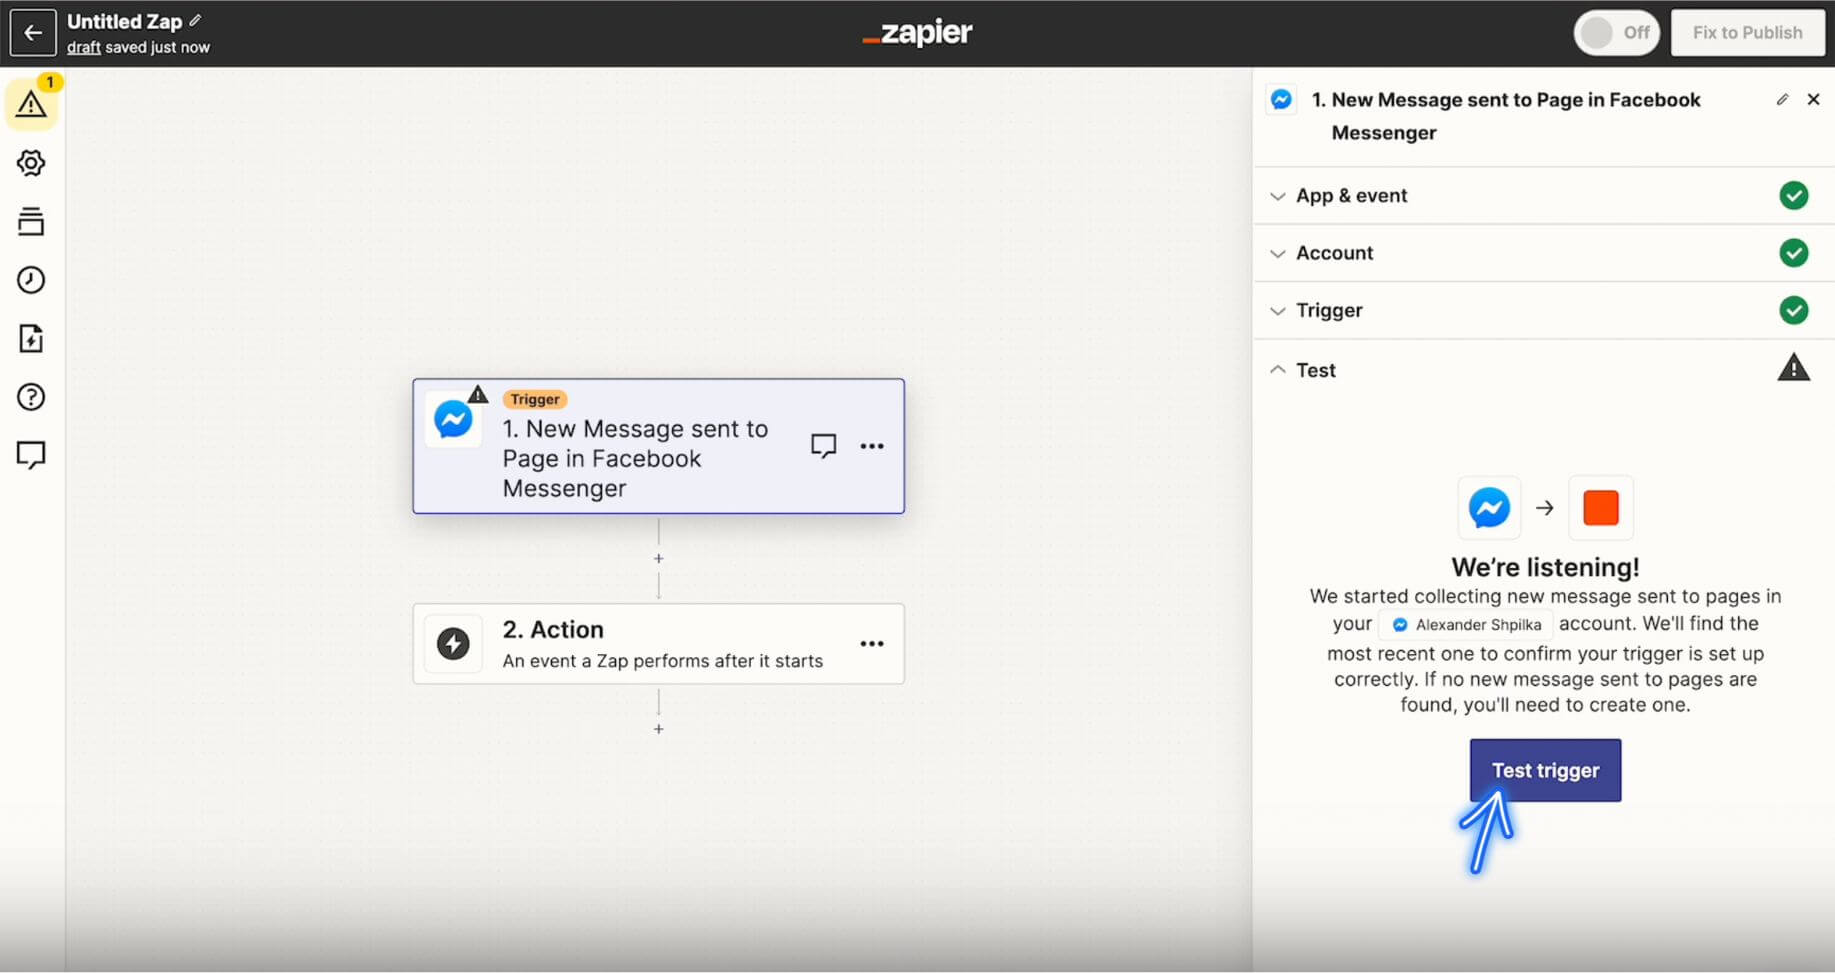
5. On the right side bar, click Test Trigger and try sending a message to the Facebook Page that you've just connected.
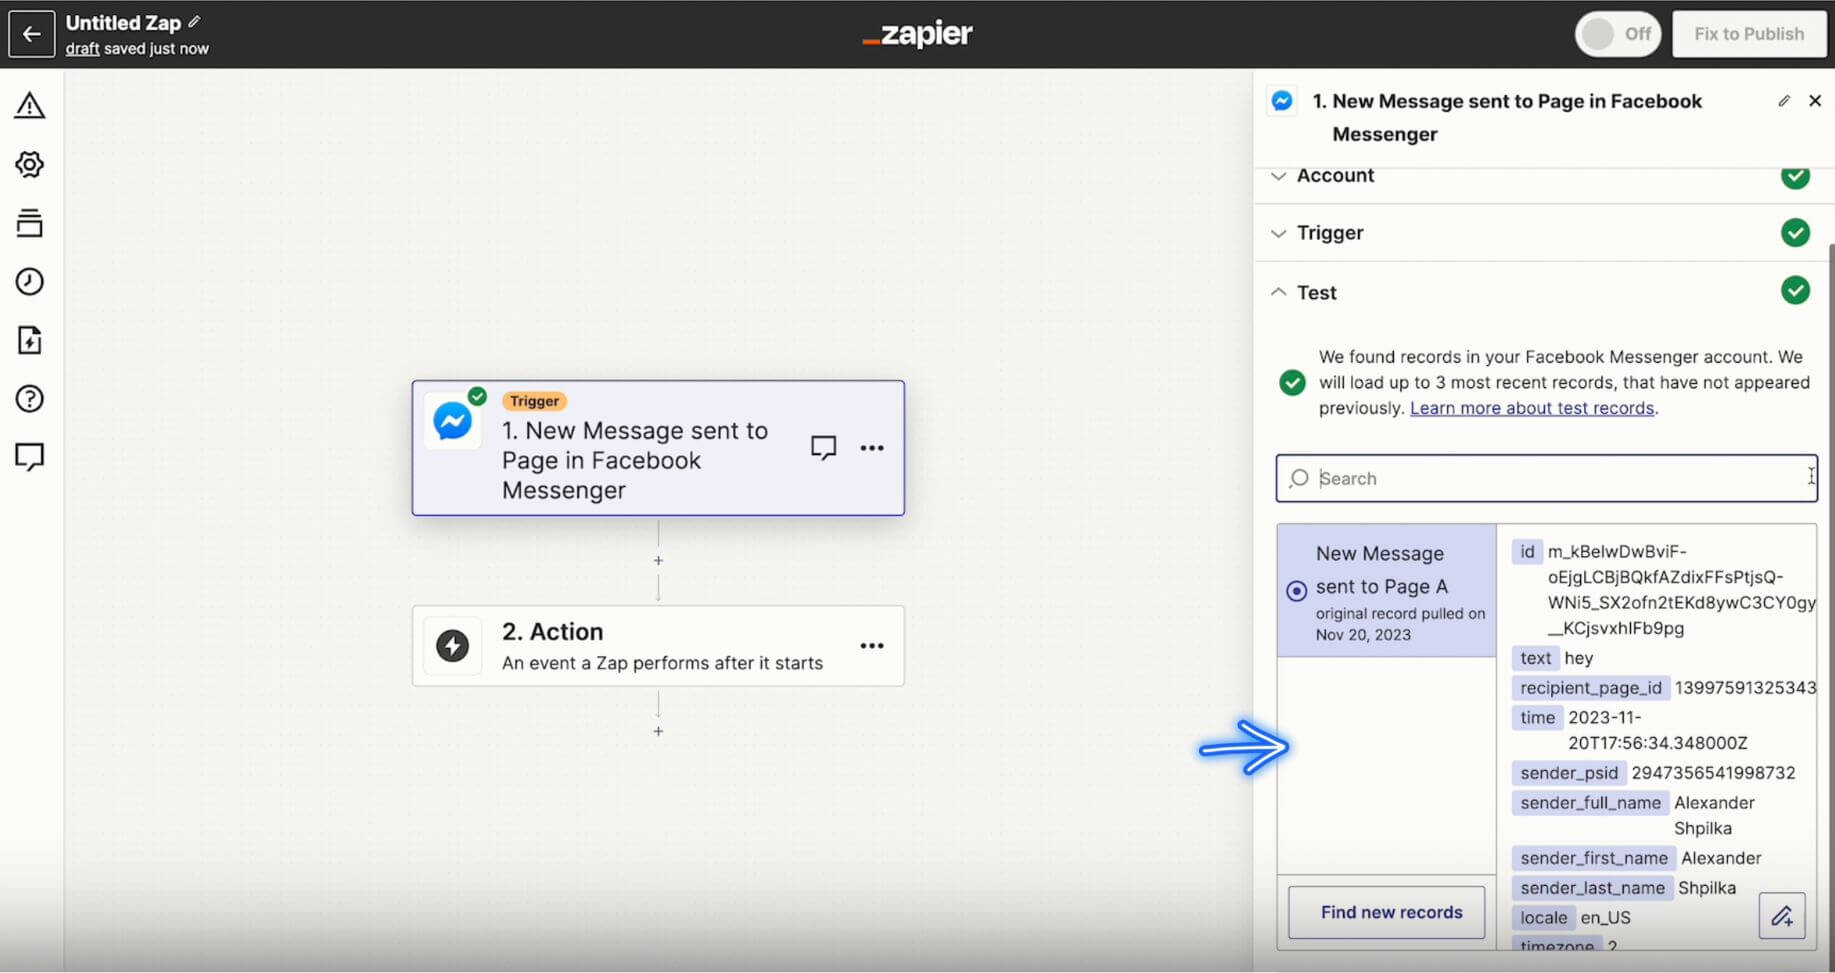
6. When you get the records on the right side bar, click Continue at the bottom.
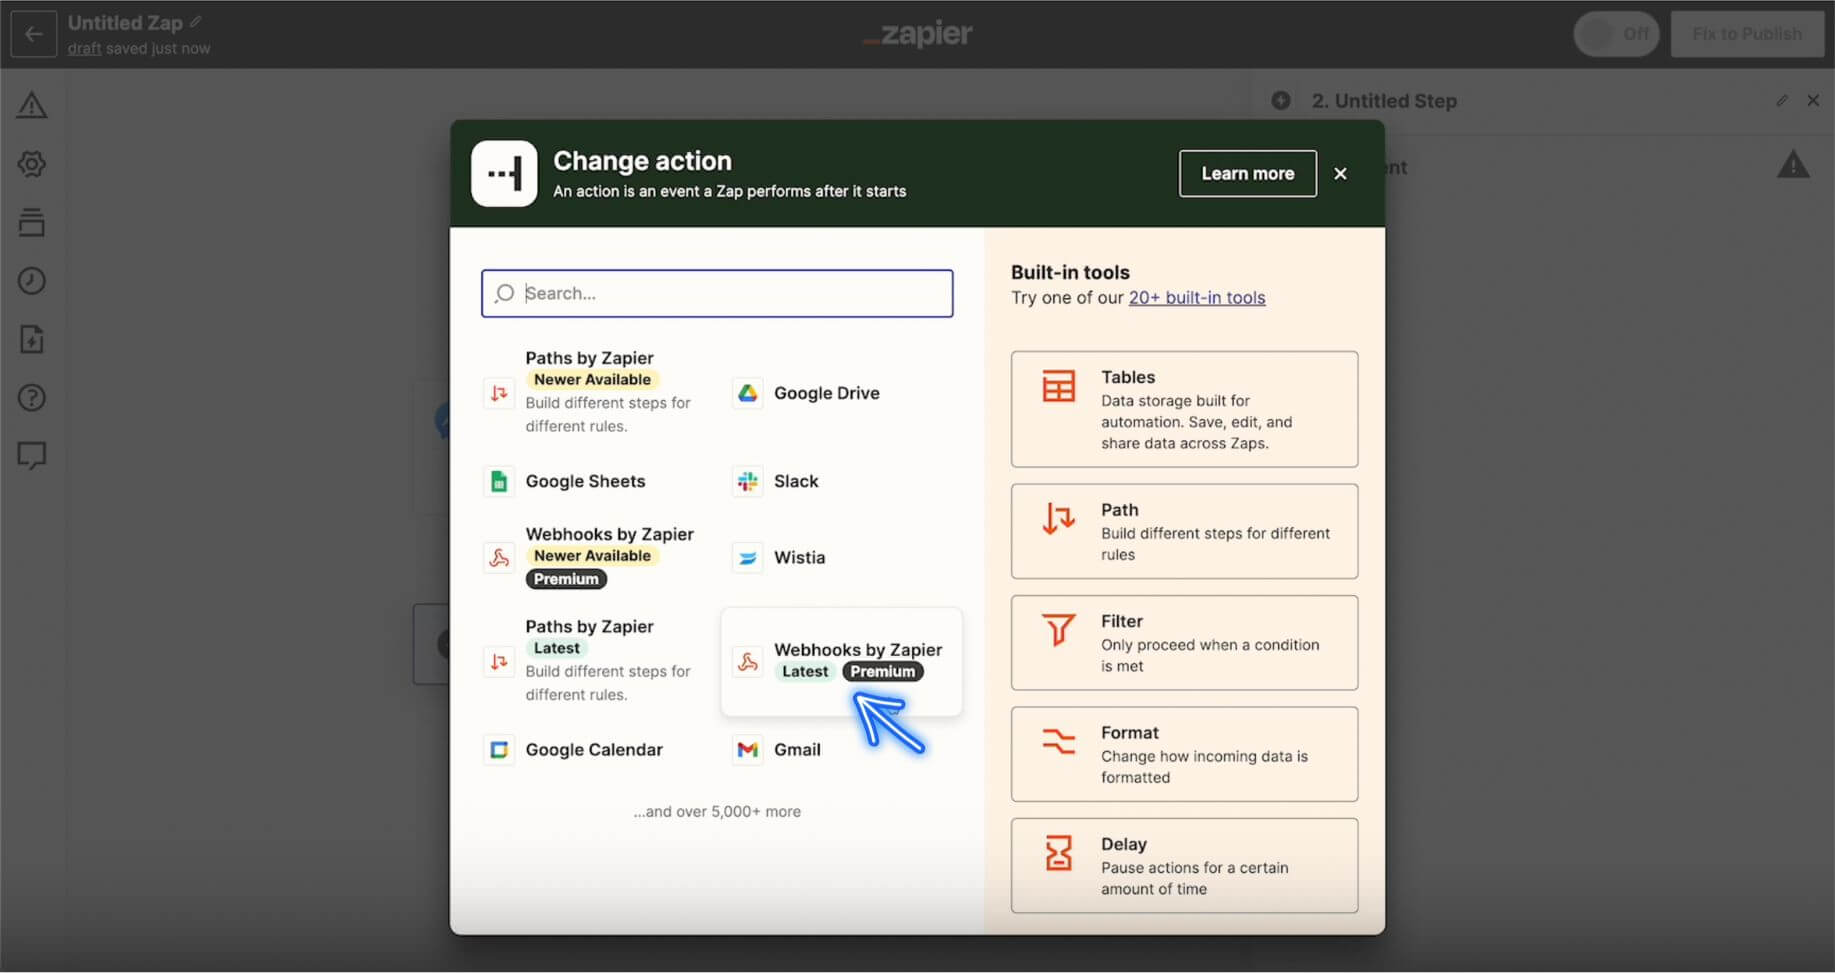
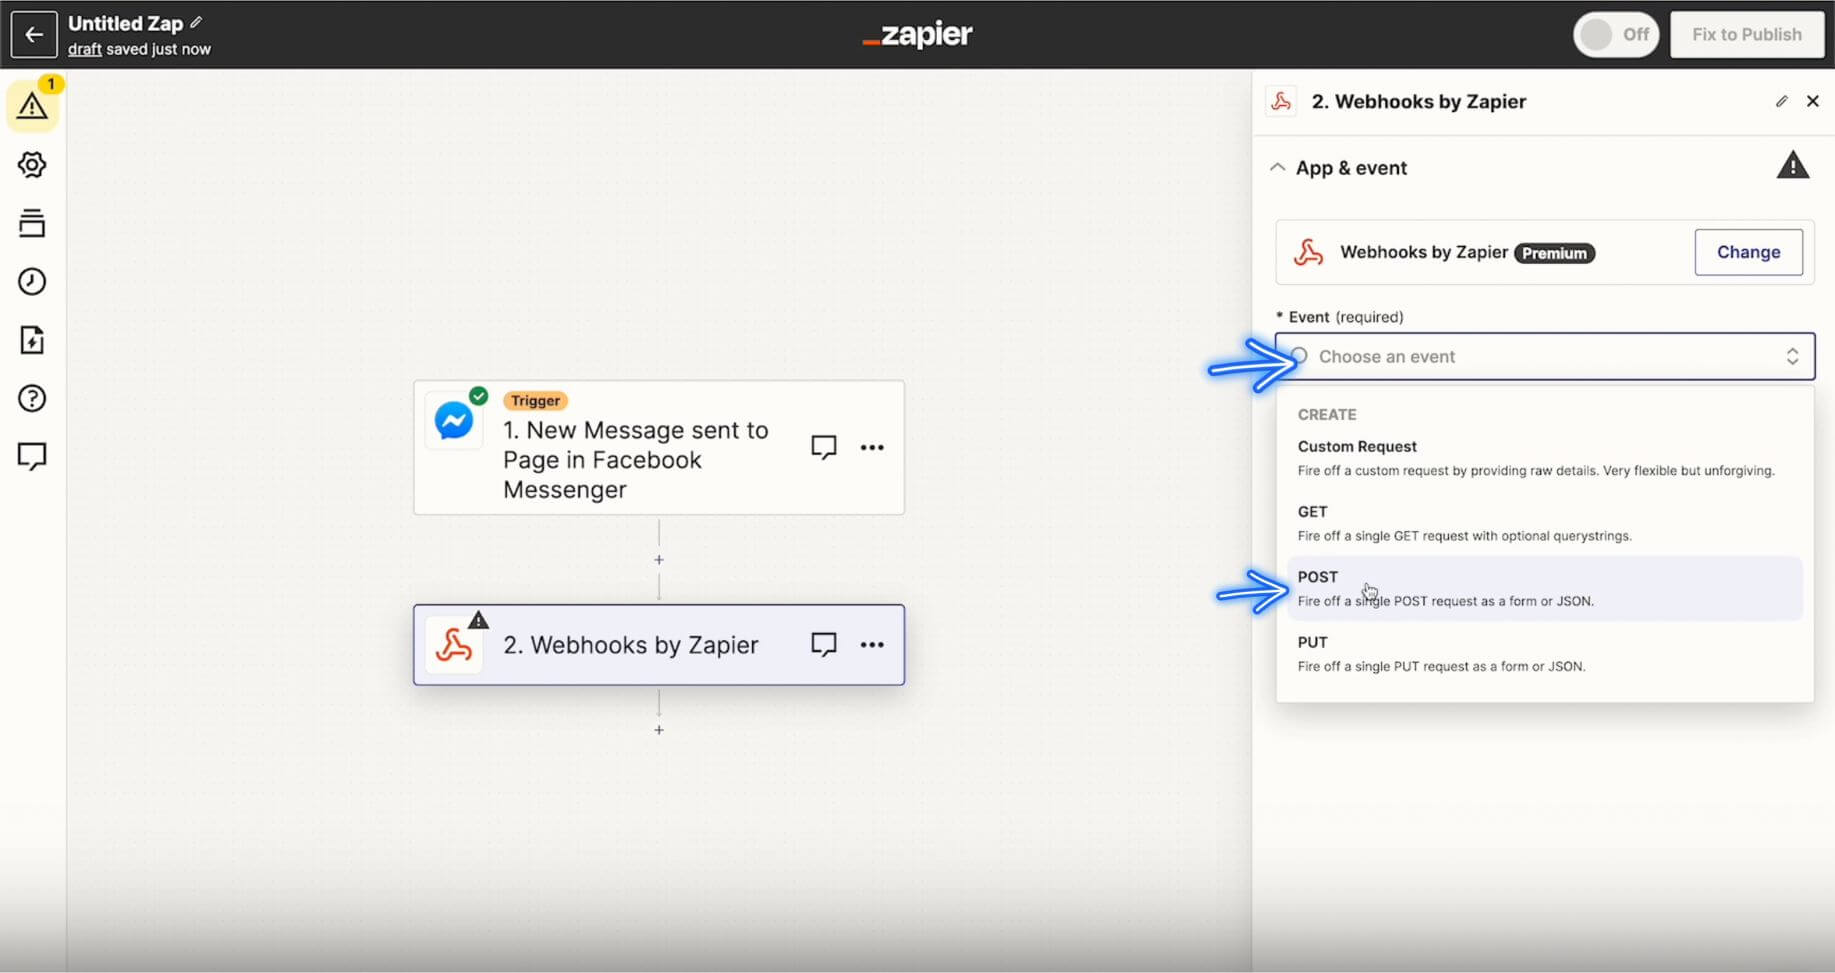
7. Next, you'll see the following pop-up window. Choose Webhooks by Zapier.
8. On the right side bar, choose POST as an Event and click Continue.
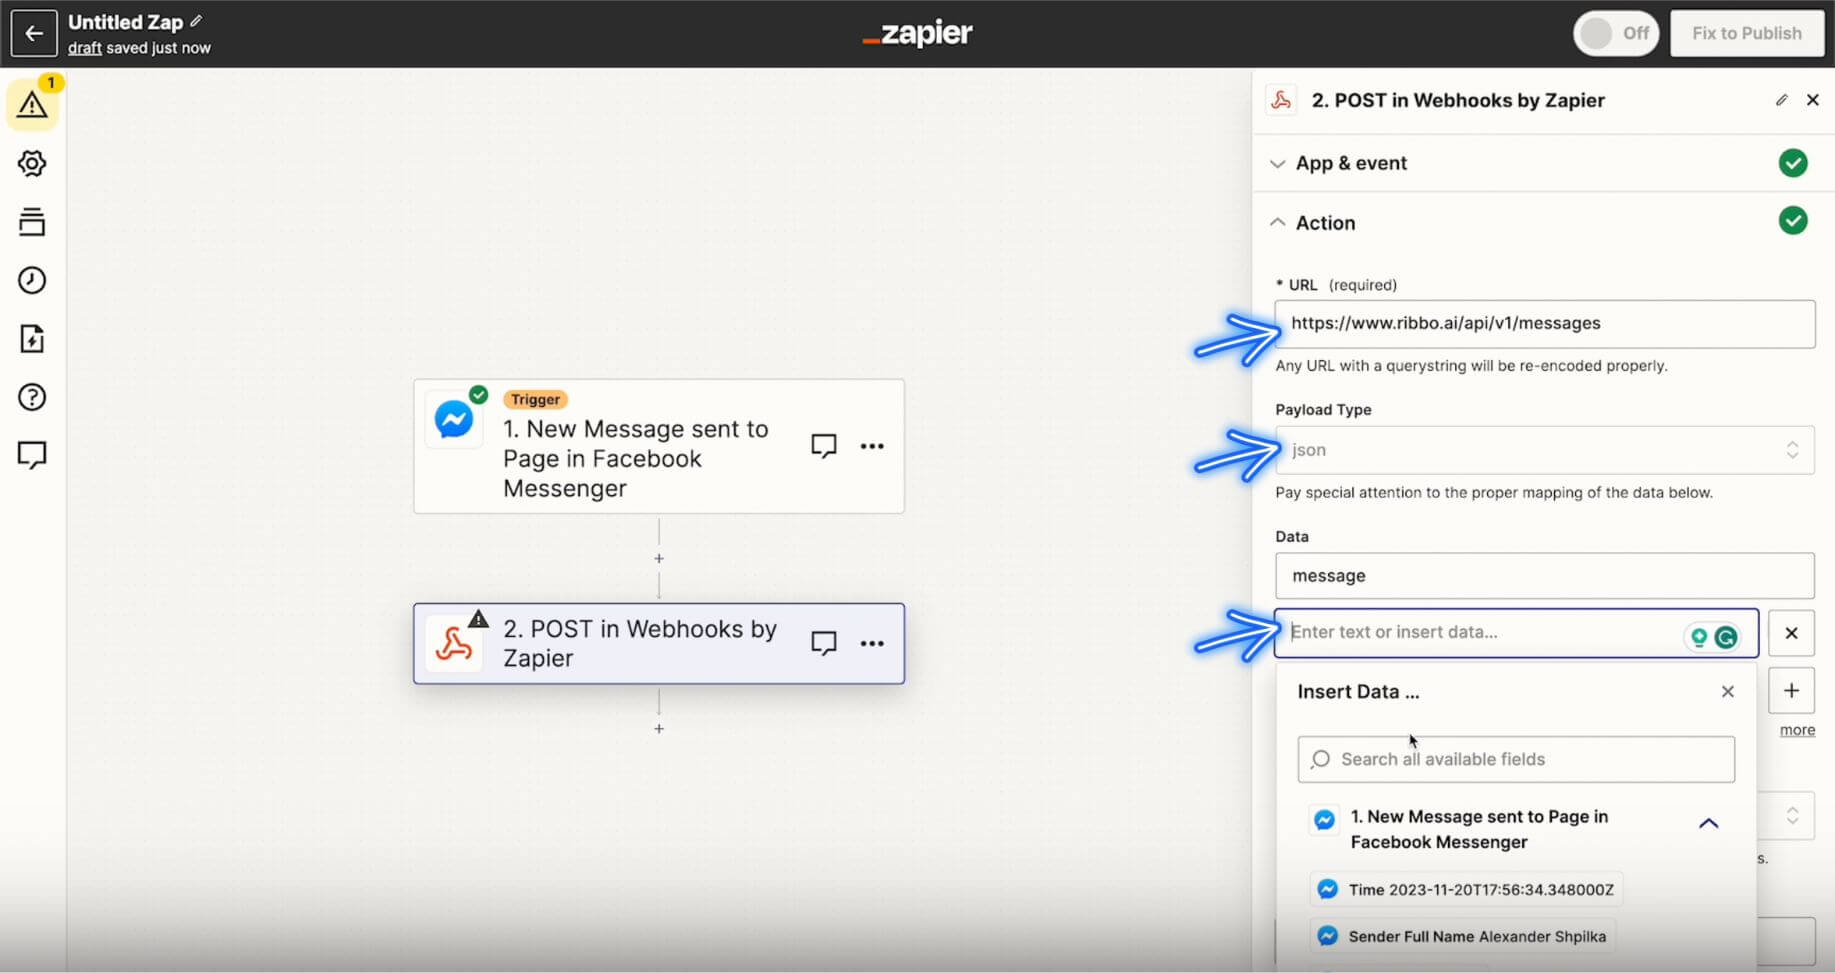
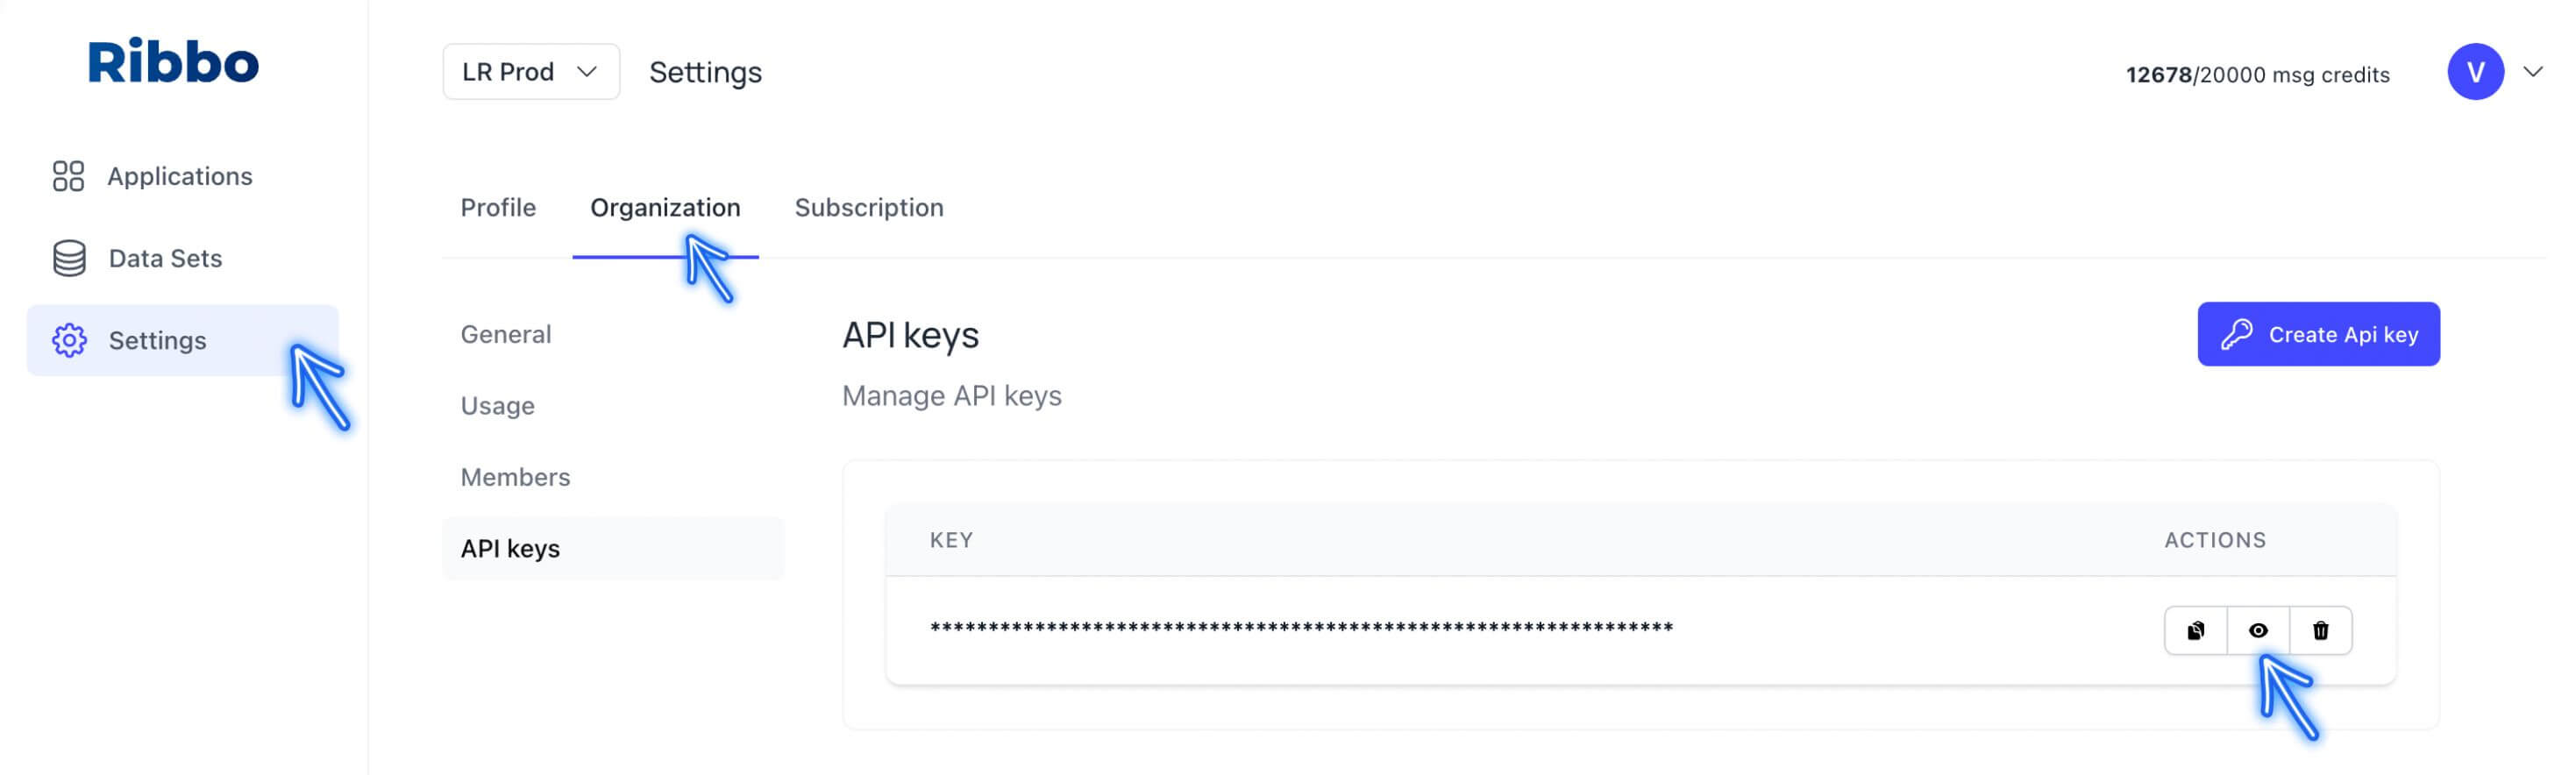
9. Paste the following URL: https://www.ribbo.ai/api/v1/messages
In Payload Type, choose Json
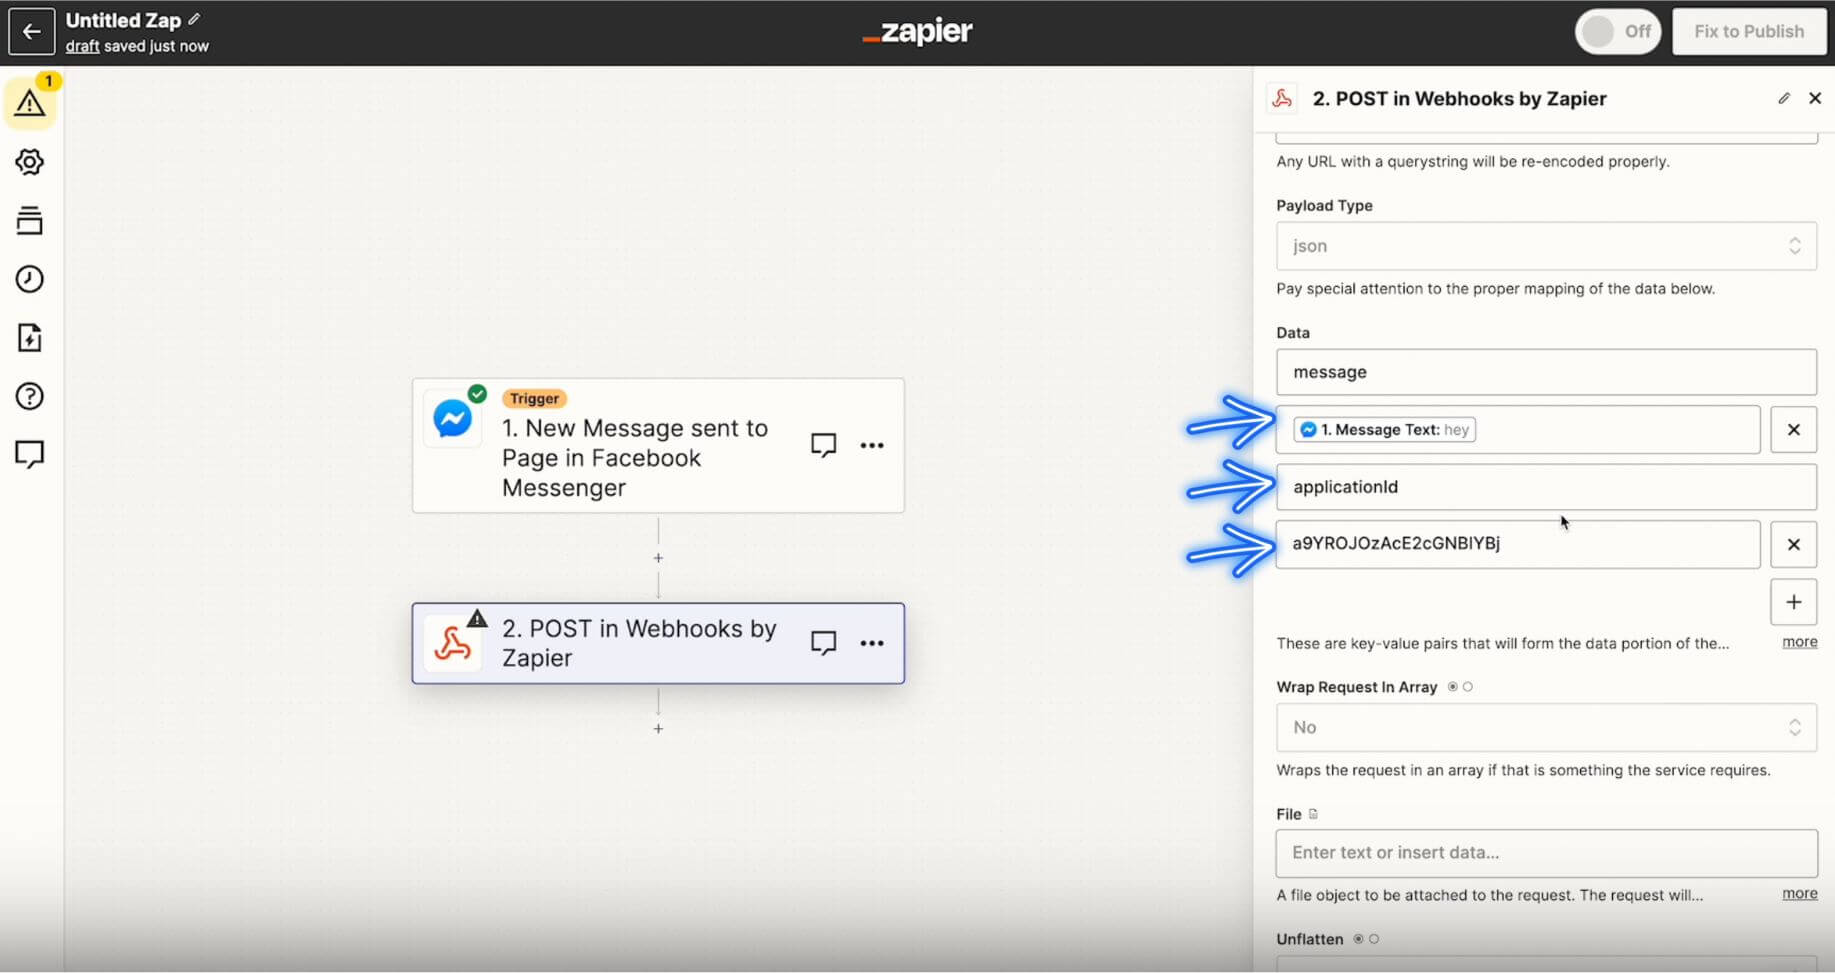
In Data, choose Message Text
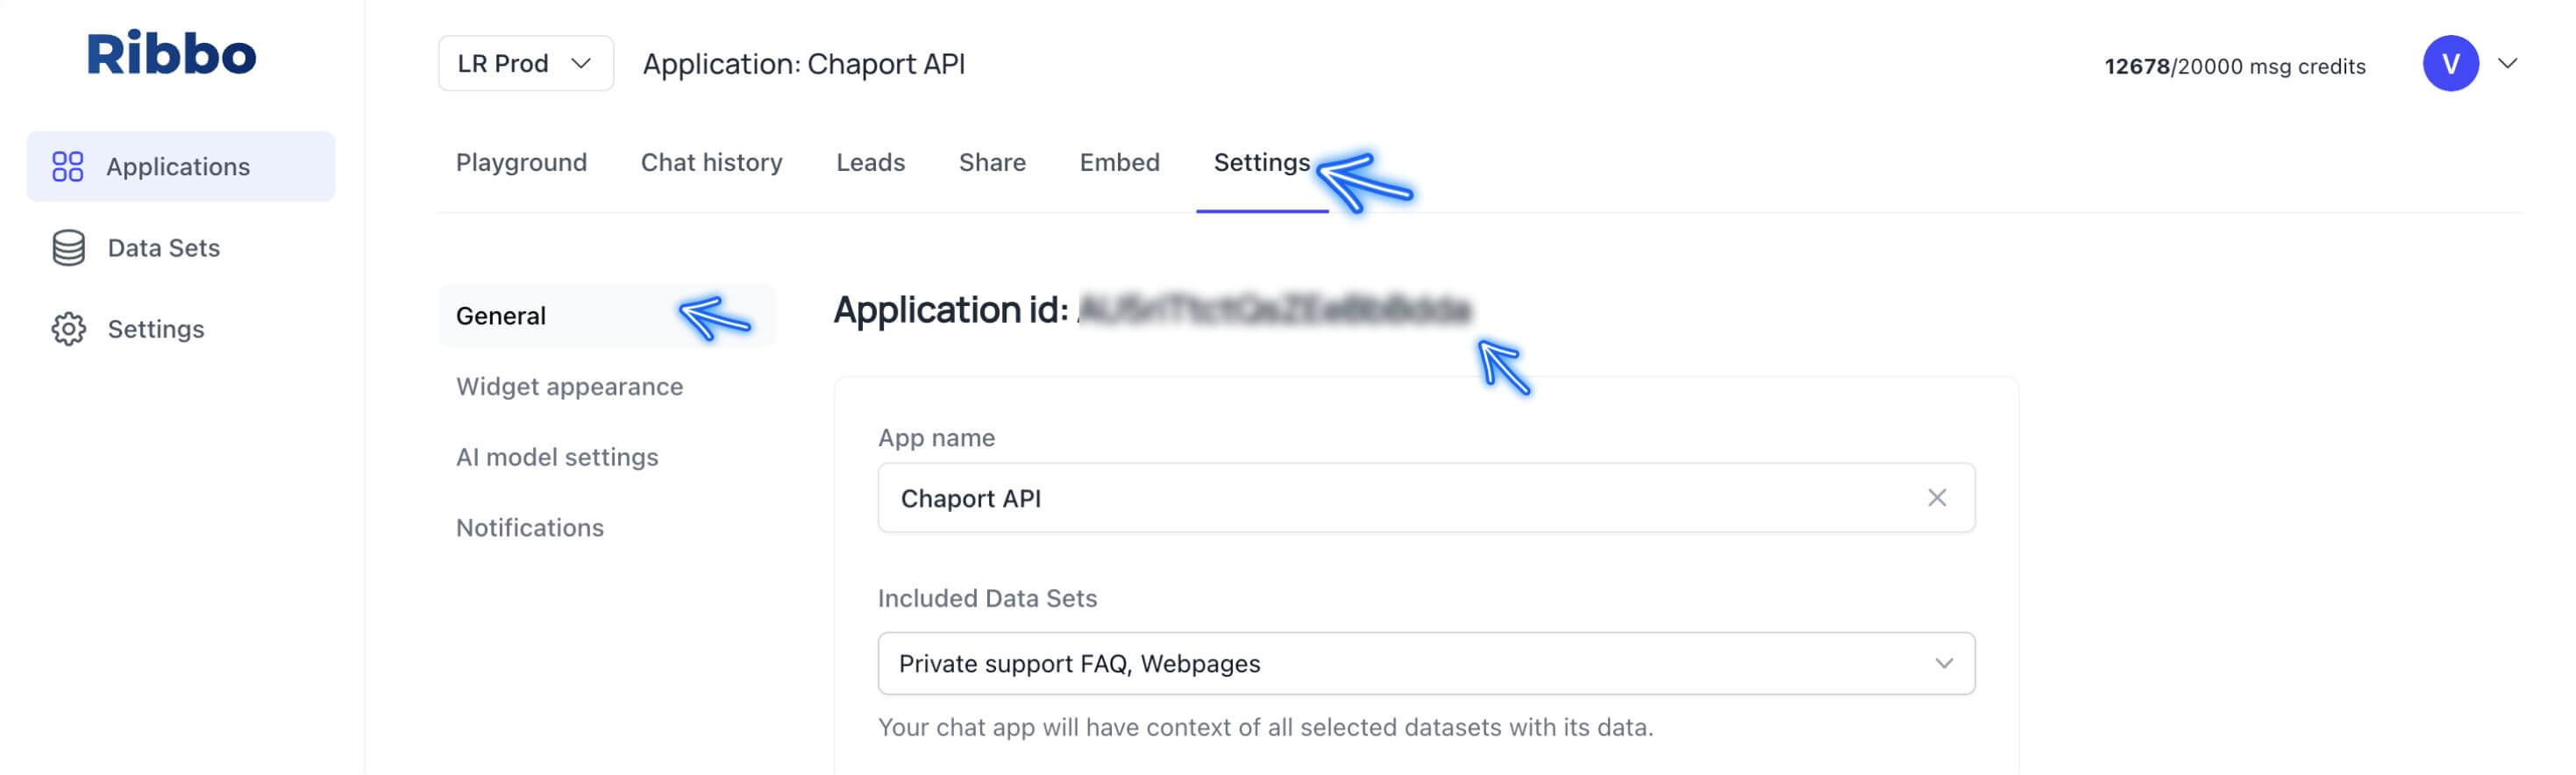
10. Then type application ID and enter your ID.
11. In Headers, choose Authorization, and enter your API as a Bearer. Then, click Continue.

12. Click + icon to add one more step.
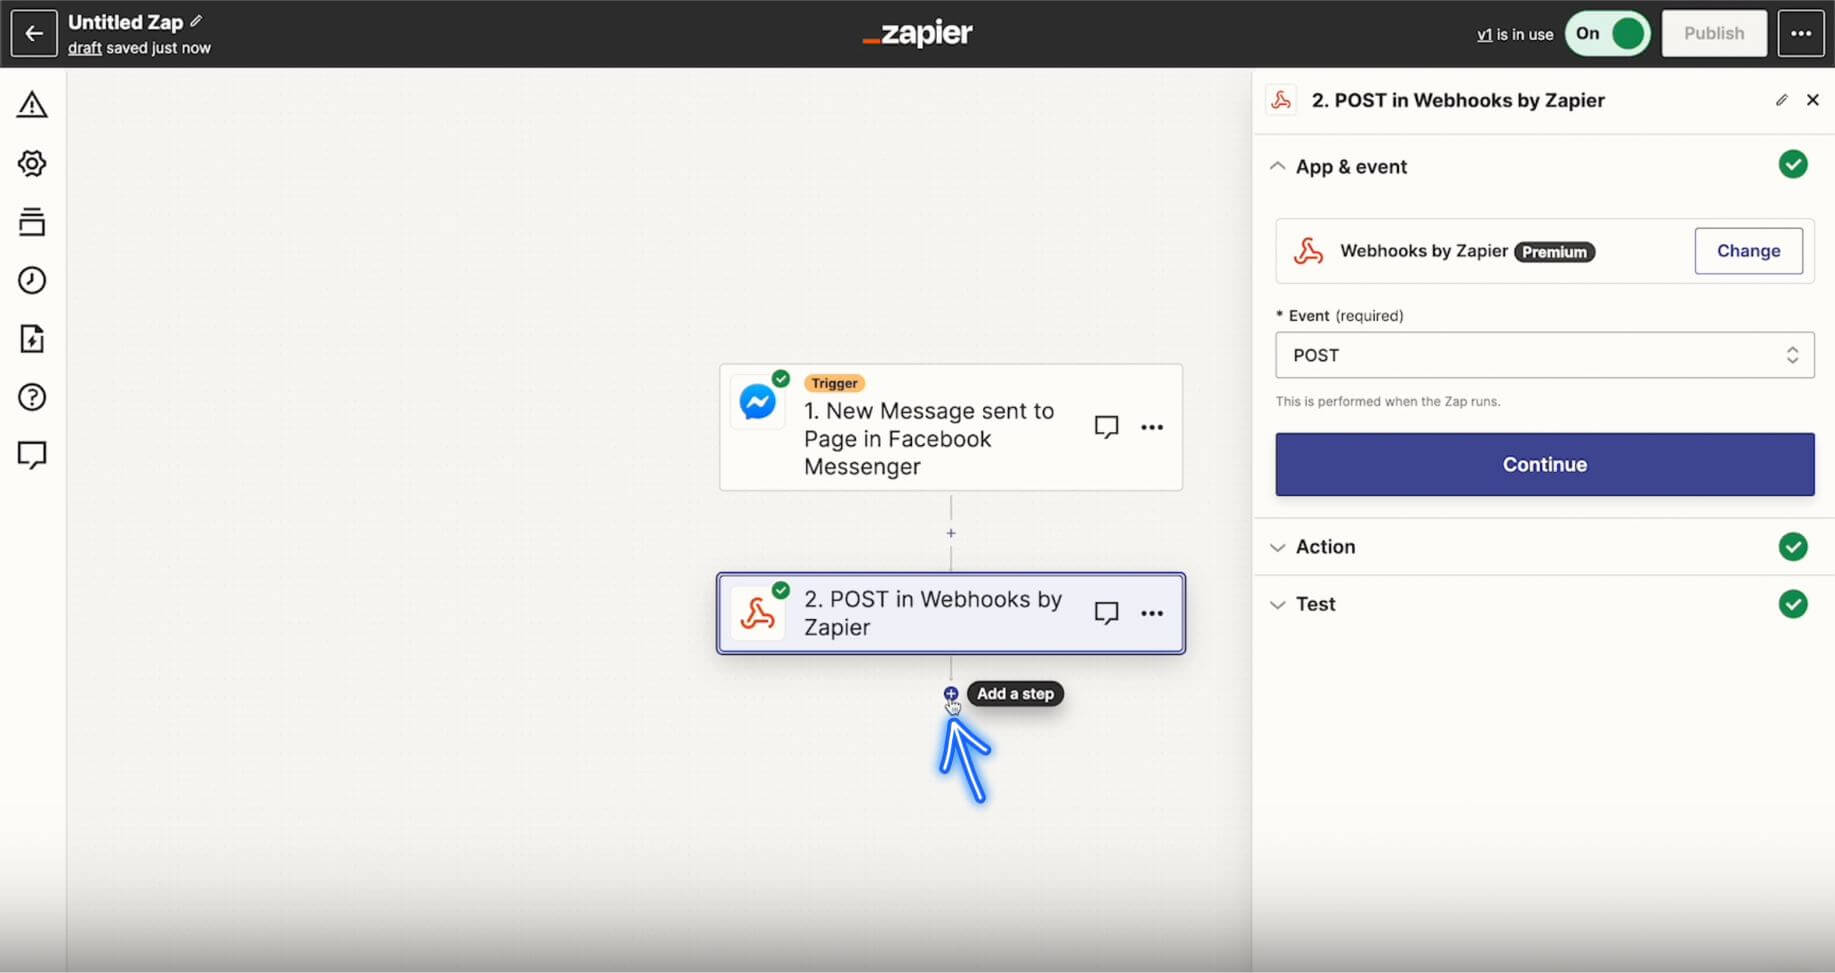
13. Choose Facebook Messenger.
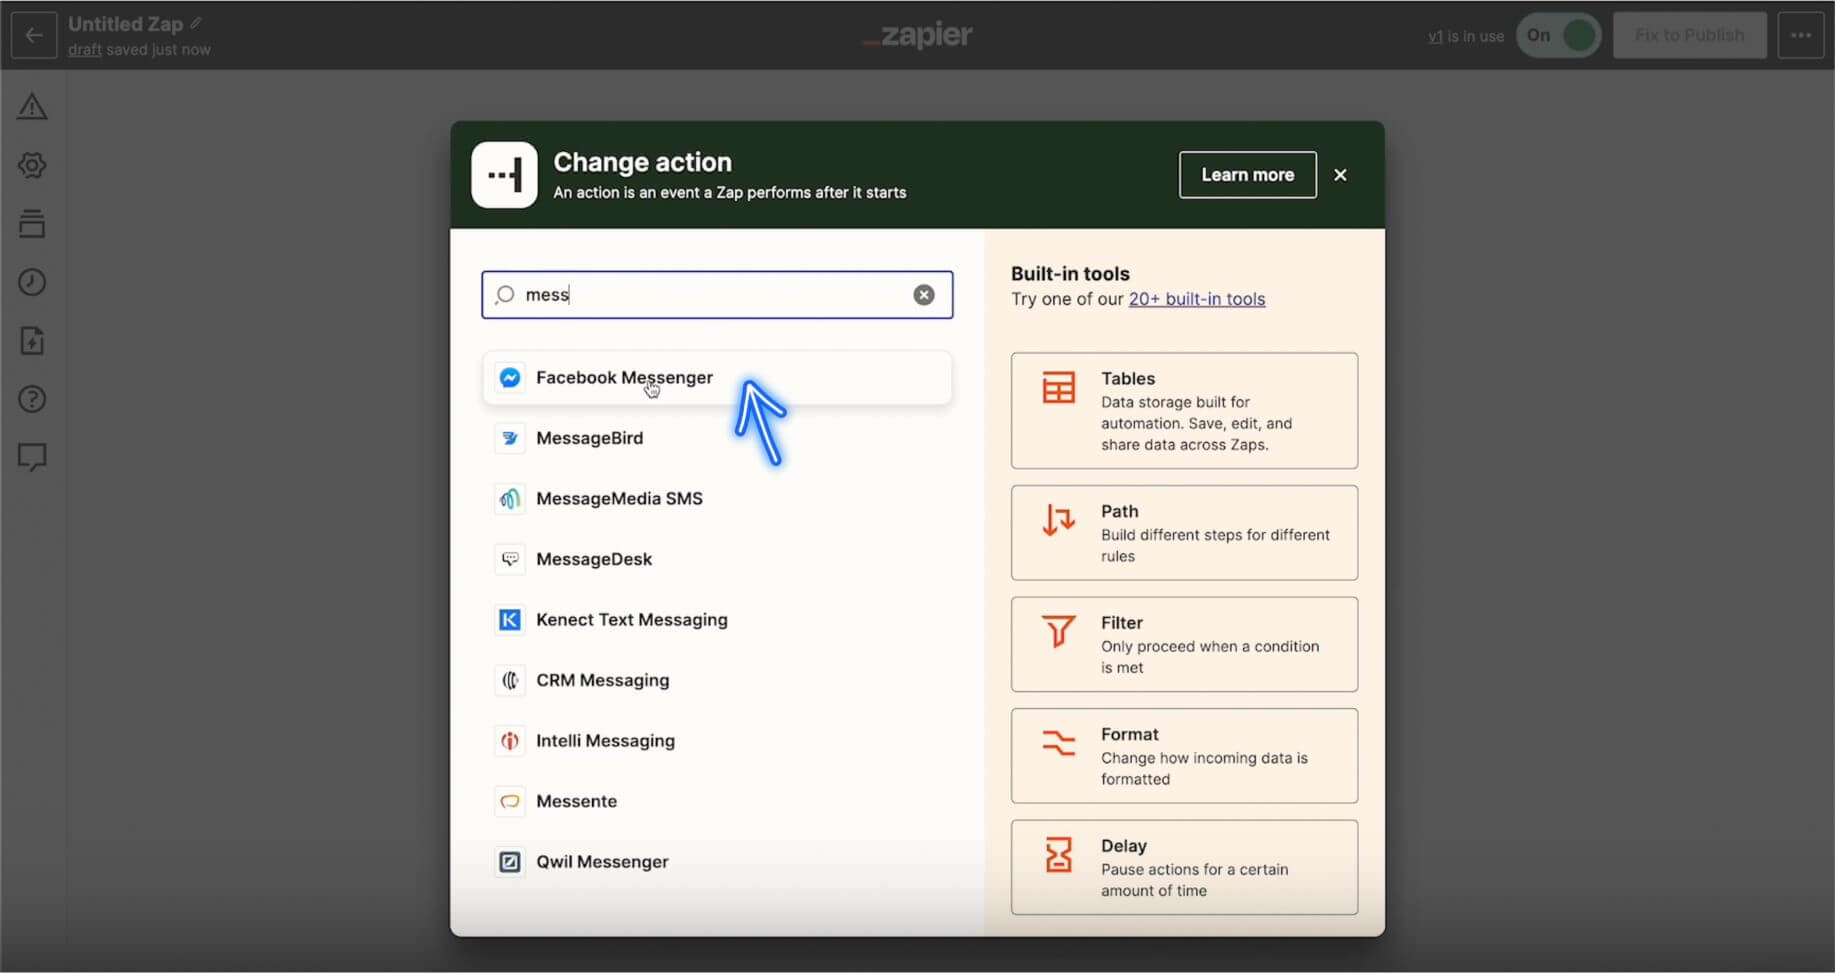
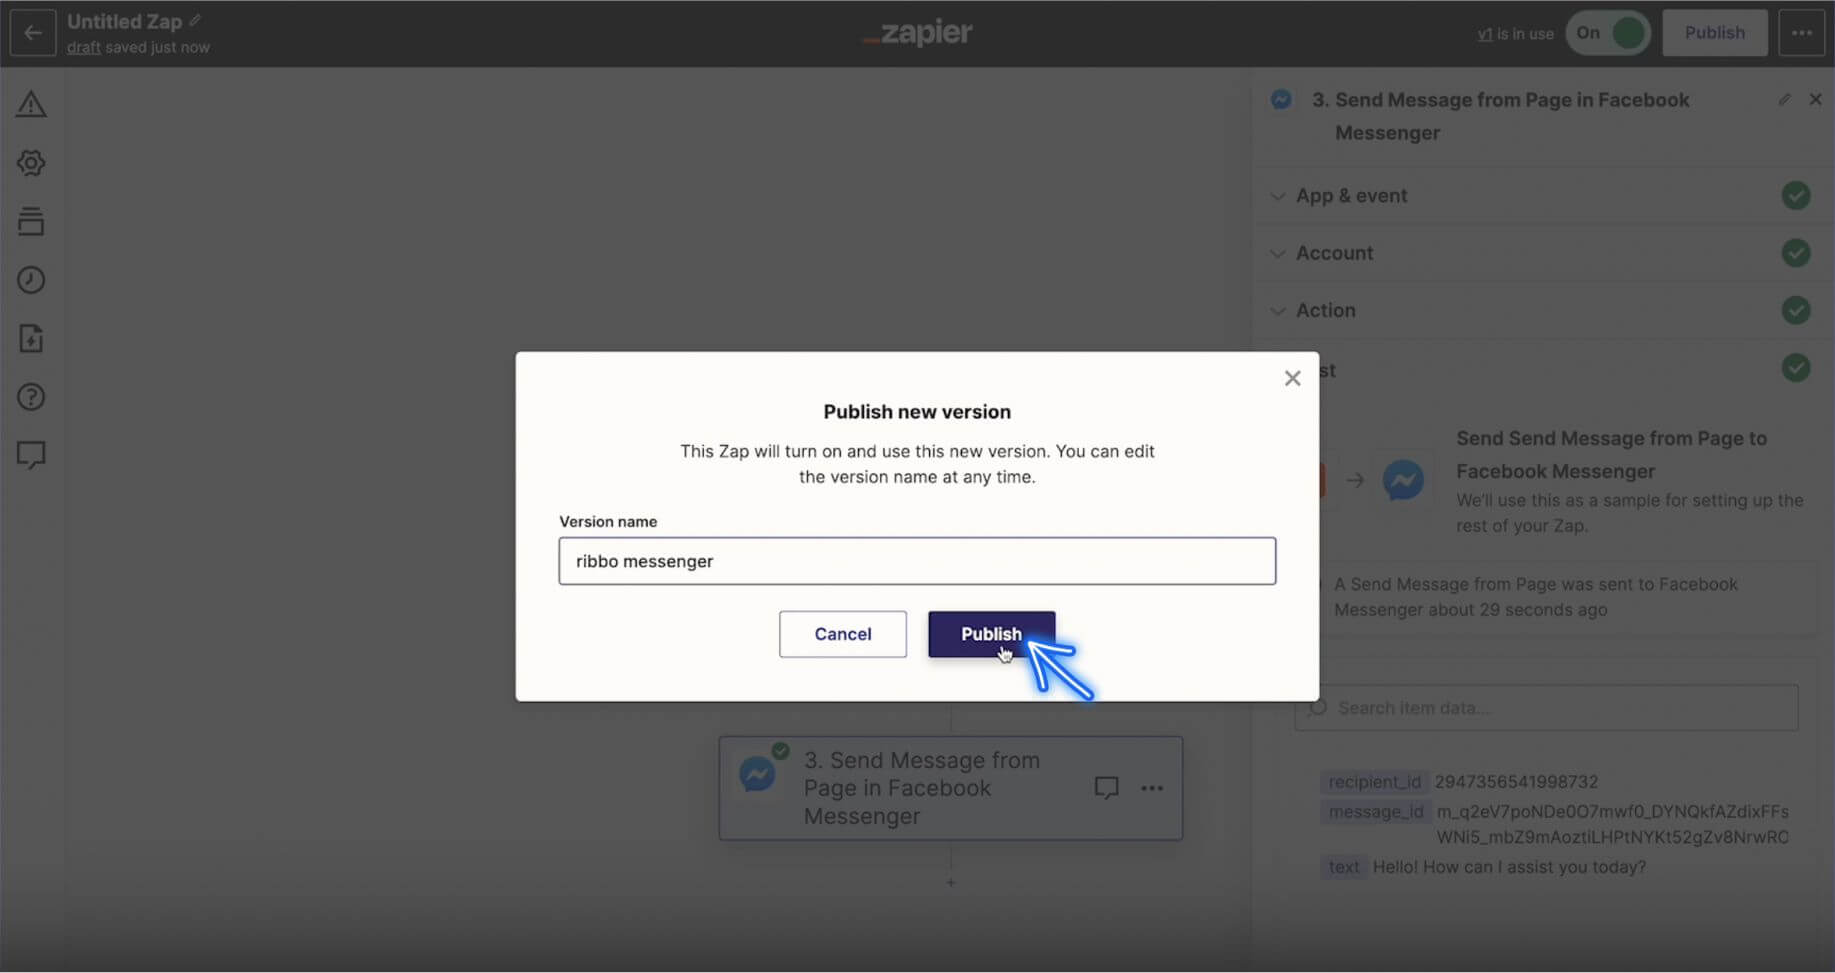
14. On the right side bar, in the Event field, choose Send Message from Page. Click Continue and head to Action.
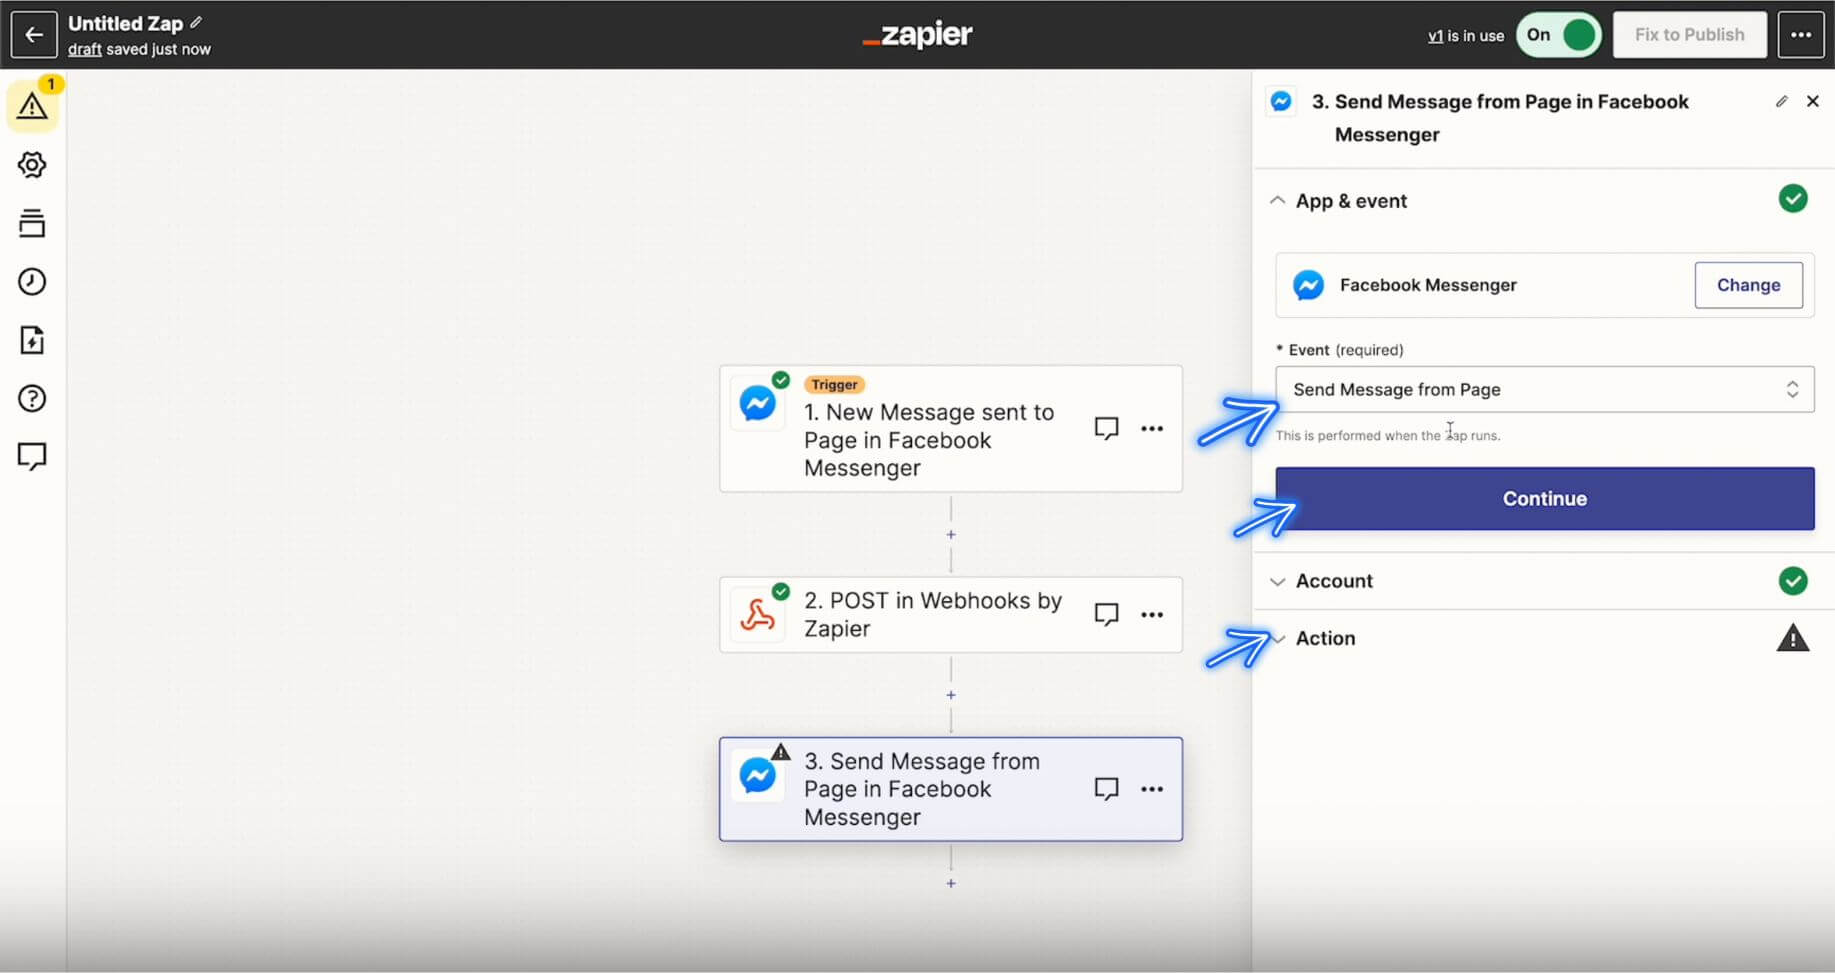
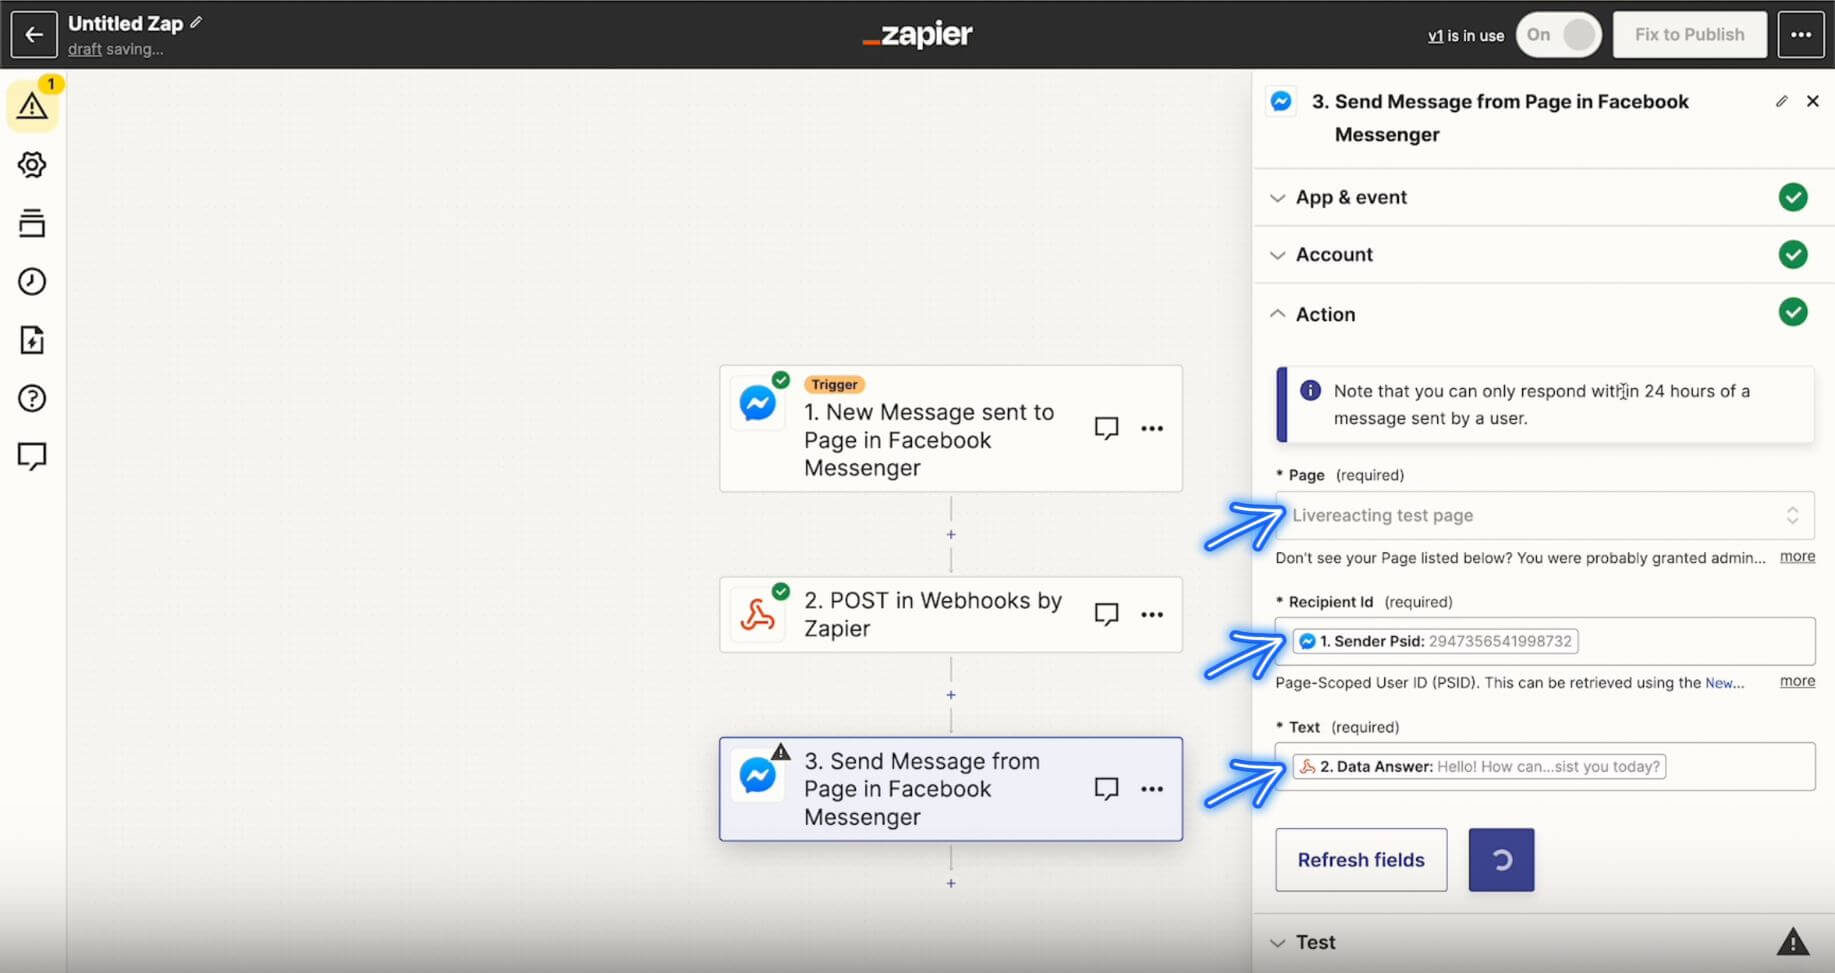
15. Under Action:
For Page: choose your Facebook Page.
For Recipient ID: choose Sender Psid.
For Text: Choose Data Answer.
16. Enter the name of your integration and click Publish. Now your chat is integrated on your Facebook Page.